 September 15th, 2019
  John
John 
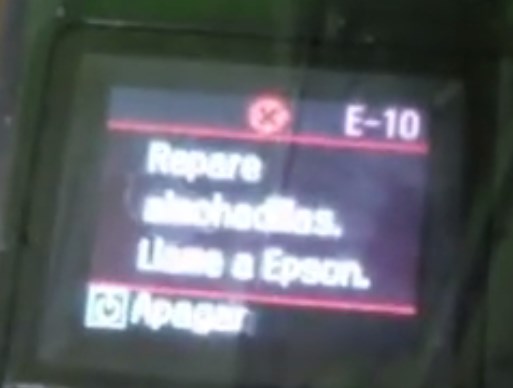
Error code: 0xF4
Description :
– PF PID lock error.
Possible causes :
– PF Encoder failure (contaminated/detached scale,encoder sensor failure).
– PF Motor failure.
– PF drive mechanism overload (paper jam, foreign object, insufficient grease, deformation of the Main Frame).
– Cable disconnection.
– Main Board failure (motor driver failure).
Solution:
First, you have to check is there any paper stuck inside printer or roller. Restart your printer after removing a piece of stuck paper.
Sometimes you won’t recognize the ink is about to finish. During printing, if the cartridge gets empty, will start giving the error. It may also be possible blank cartridge error code can differ in respective models.
Solution for Epson error code 0xf4 is to check all the possibility which can stop the printer.